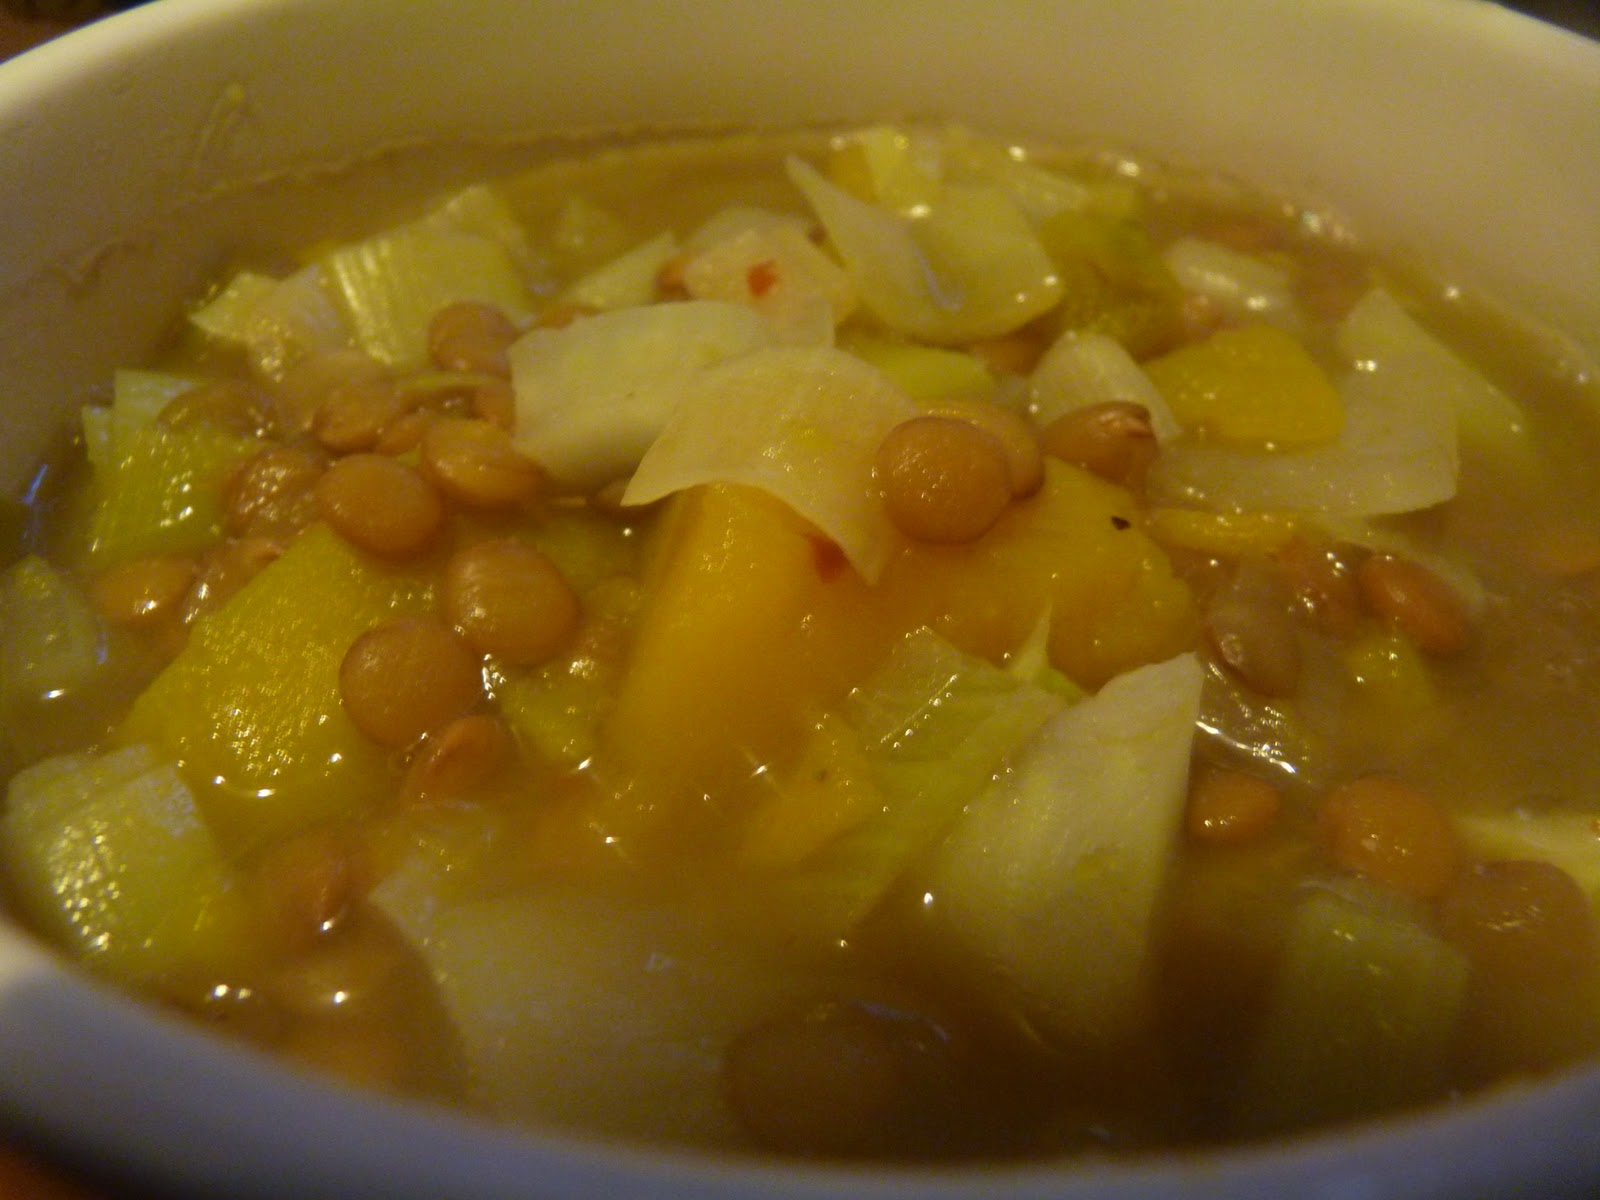
Monday, January 23, 2012

What on Earth Were You Leeking!?!?!?

Why, Hello my fellow foodies!  Boy, oh boy, do I have a treat for you!  Now, we all love potato and leek soup, correct!?  Who doesn't?  And, why wouldn't they considering that it usually is dripping with bacon (and the grease) and cream?  Now, what if I told you that I had a recipe that was just as delicious and completely meat and dairy free?  You'd be stoked, right?  Well, if not, you should be!  This means that it has all of the nutritional benefits without any artery clogging, cancer-causing, zit-bearing, mood-altering ingredients.  Just nutritious and wholesome goodness in each bowl!  And, I'll even give you a radish, asparagus and broccolini salad to boot!  So, now that I am in the giving mood, here we go!

Leek & Potato Soup

3 large or 5 small leeks, dark green parts cut off and cut into quarter moons
1 lb. red potatoes, quartered and roughly diced
4 ribs of celery, diced
2 carrots, diced
4 cloves garlic, smashed
6 c. vegetable stock ( to make an amazing vegetable stock just put into a pot; the green tops of the leeks that you just cut off, 1 bunch of green onion, one bunch of parsley, one red onion cut in half, four cloves garlic, one lemon cut in half or one apple cut in half, 2 sprigs of thyme, 2 sprigs of rosemary and 2 bay leaves and let simmer for at least 2 hours)
salt and pepper to taste


Now, the most amazing thing about this soup is that it is the easiest thing in the entire world to make!  All you do, literally, is through all of the ingredients into a soup pot, except for the stock, with a bit of grape seed oil and saute until the veggies are translucent, the leek begin to get creamy and the potatoes start to cook through.  Then, add the stock and bring to a boil.  Turn down to a simmer, cover, and cook for 45 minutes to an hour. Take your hand held blender and cream the soup.  Serve and eat up right away.  IN fact, this soup was gobbled up before I could even take a final photo, so you know it is damn good!  

Next on our list today is our Radish, Asparagus and Broccolini Salad.

12 spears of asparagus cut on a slant into 1 1/1 in. pieces
8 sprigs of broccolini, trimmed and cut into bite sized pieces
grapeseed oil
salt

4 red radishes, halved and thinly sliced
zest of 1 lemon

juice of one lemon
4 tbsp. olive oil
1 tbs. red pepper flake
1/4 c. pine nuts
1 garlic clove, minced
1/4 red onion, minced
2 pinches of salt
pepper to taste


Cut up the asparagus and broccolini and set aside.  Then cut up the radishes and zest the lemon and set aside in a small bowl.  Then, combine the lemon juice, olive oil, red pepper flake, red onion, garlic, pine nuts, salt and pepper in a small bowl and whisk together, set aside.


In a frying pan, heat up 2 tbsp. of grape seed oil over med/high heat.  Once heated, add the asparagus and broccolini.  Stir to coat and then cook, covered, for 1-2 minutes.  Lift the lid and toss. If needed cook for an additional 1-2 minutes. but just enough to blanch and change the color of the veggies to a bright green.  Once this is achieved, remove from heat and add the radishes and lemon zest, toss.  Now, add the dressing and toss again. Serve immediately.  


This salad is absolutely delicious, but one thing for everyone making it to keep in mind is that it does not save super well.  The flavor does change and the veggies do get a bit soggier.  You may want to adjust the portions to what you think you might eat that night.  This recipe should yield about 4 servings.

Alright, my friends, I hope you enjoy eating these tasty dishes as much as I enjoyed making them!

Monday, January 16, 2012

Colonel Mustard...In the Potato...With the Soup Pot!

Well "Hello!" there friends!  You are in for a fiber-filled treat today!  One of the things that I think you can't mess up, soup-wise at least, are lentils.  No matter what you mix them with they just always manage to take on the right flavor and fill you up while tasting great.  And what would be the perfect side-dish for some light and smooth soup???  You guessed it...some crispy roasted root vegetables with a mustard sauce that would rival a sour cream topping any day.

To begin we will start with the Lentil and Kabocha Squash Soup.


1 kabocha squash, cooked and cut into cubes
1/2 cup water
1 tablespoon olive oil
sea salt
1 cup green lentils, rinsed
5 coins ginger, 1/8-inch thick
1 whole star anise
6 cups water
1 teaspoon sea salt, plus more to taste
1/4 cup olive oil
1 yellow onion, medium dice
1 leek, sliced into 1/4 moons
1 fennel bulb, medium dice


red pepper flake


Preheat your oven to 425 degrees.  Cut the squash in half and remove all of the seeds with a spoon. Roast on a baking rack with the cut side down and the 1/2 c. of water poured into the pan for 35-45 minutes.  Once cool enough, scoop out the squash in small cubes and set aside. 
In a medium sauce pan combine the lentils, star anise, ginger and 6 c. water over medium heat.  Bring to a boil and turn down to simmer for 30 minutes.

In a large stock pot heat the olive oil over medium heat.  Add the leeks, onion and fennel. Cook until the vegetables soften and become iridescent in color.
Remove the ginger and star anise from the saucepan and add the lentils and lentil broth to the vegetables.  Bring to a simmer and add the salt, squash and red pepper flake.  Cook for about 15 minutes and then serve.

Now it is time for our Roasted Root Vegetables with Mustard Sauce.
1 1/2 lbs. waxy potatoes, quartered   
1/2 lb. baby carrots, halved
1/2 lb. parsnips, halved
6 shallots, peeled
1/4 c. olive oil
2 large pinches of salt
2 bunches of green onions


Dressing:
2 tbsp. red wine vinegar
1 shallot, minced
3 tbsp. dijon mustard
1/2 c. olive oil
pinch of salt
1-2 tbsp. soy creamer


Preheat oven to 375 degrees.


In a large bowl, combine all of the ingredients except for the dressing ingredients.  Toss.  Spread on a large baking sheet and bake for 45-60 minutes.  Remove green onions after 20 minutes and set aside.


Combine all dressing ingredients except for the olive oil and creamer.  Mix well.  Gradually whisk in the olive oil.  Add creamer and mix well.


In a large bowl combine the veggies with the dressing and serve.    


There we have it!  A good way to get your week's worth of fiber in one meal.  Also, sweet potatoes would be a great addition to the roasted vegetable recipe!  And, the lentil soup tastes 10 times more amazing the next day.                                  

Thursday, January 12, 2012

Tostada Tuesdays!

If there is one thing that I look forward to after a long day at work when all I want to do is get off my feet and the last thing that I want to do is cook, it is Tostada Tuesdays.  Don't let the name fool you!  We make these babies any day of the week when we get home and just barely have enough energy to chew.  They are fast, delicious, and, almost mess free!  On a lazy day these are the perfect comfort food that will fill you up and give you much more nutritional value than caving in and getting that McRib sandwich.  Plus, you also won't want to die and go into McFood induced coma afterward either.


First things first.  To start off you have to prepare the Guacamole.

4 ripe avocados, diced
1/2 small red onion, diced as finely as humanly possible
1 jalapeno, seeded and diced
4 cloves of garlic, also diced as finely as humanly possible
zest of 1 lime, juice of 1/2 the same lime
pinch of cayenne
1/2 tbsp. cumin
pinch of salt
some fresh cracked pepper to taste
a drizzle of olive oil
chopped cilantro


Plop all of the ingredients into a bowl and mash up with a fork.  I like to leave some larger chucks in mine, but you can get it to whatever consistency is best for your taste buds! Adjust any spices or ingredients to your liking, also.

Now that the guacamole is done we can move on to the main dish...our beautiful Tostadas.

4 corn tortillas
2 tbsp. canola oil

1 can of Trader Joe's Fat Free Refried Beans
1 tbsp. earth balance
1/4 small head of red cabbage, shredded
1 large tomato, diced
4 green onions, sliced
cilantro
one batch of guacamole


Begin by slicing, shredding and chopping all of the vegetables.  Feel free to omit or add any to your liking. Set the toppings aside and lets get to the good stuff!  In a small frying pan heat the canola oil over medium heat.  You will know that the oil is hot enough when you flick a little water on it and it makes a popping noise.  While the oil is heating we will start getting the beans ready.  In a small pot add the can of beans with the earth balance.  Heat is through very slowly on low heat.  Stir occasionally to mix.  Once the oil is ready get the tortillas out and fry one at a time.  Fry on each side for about 3-4 minutes or until lightly golden brown.  Once the tortilla is done, transfer it to a paper towel and cover both sides to soak up any extra oil. After you are done frying it is time to layer!  I always start with a generous layer of beans and then decorate the top with the sides.  However, these are your little bits of edible art work and you can design any way that you wish.  Have fun and enjoy your tostadas!!!!!


Sunday, January 1, 2012

Doyle's Detox Dinner

After an evening filled with friends, food, fun, and, unfortunately for Doyle, half of a bottle of Bulleit Rye you might not feel like you are bringing your "A" game!?  In fact, you might just feel like downright poop!  After a day of headaches and misery I decided to try to cure this hungover lad with some vitamins and delicious food.


I started off my slicing endeavors with a Dilled Fennel and Arugula Salad.  


1 zucchini, sliced paper thin
1 medium fennel bulb, also sliced paper thin
1/2 c. chopped dill
1/3 c. lemon juice (2-3 lemons)
1/3 c. extra virgin olive oil
3 tbsp. honey
salt
sliced almonds, garnish
a few solid handfuls of arugula


Start off by slicing the zucchini and fennel bulbs very thinly!


Mine definitely aren't as thin as paper, but you catch my drift.  Throw the zucchini and fennel in a bowl with the dill, olive oil and lemon juice.  Let it sit for at least 20 minutes, stirring occasionally to make sure everything is marinating equally.


After 20-60 minutes add the honey and salt to the fennel mixture. Fill salad bowls with arugula and drape the fennel mixture on top. I spoon a little extra of the dressing onto arugula as well.  Then top off with some sliced almonds.


Next on our list of bourbon fighting foods is some Garlic Roasted Kale.  This stuff is great as a side dish at dinner or even a late night snack!


1 bunch of dinosaur kale (or any type for that matter!)
olive oil
salt
2 tsp. garlic powder
Cracked black pepper


Dice up the kale into thick chunks and discard the stems.  Throw into a bowl with the garlic, salt and olive oil to your liking and toss to evenly coat the kale leaves.  Place onto a baking sheet and bake in an oven pre-heated to 375 degrees for 10-15 minutes.


I also wanted to make him some booze-absorbing soup! What better way to do that than with some lentils, split peas and some spices to get that stuff out of his system!?  


For the main course we have some Coconut Curried Red Lentil Soup. This soup was inspired by the blog 101 Cookbooks.  So far, every recipe that I have tried from that blog has been nutritious and delicious!


1 c. yellow split peas
1 c. red lentils
7 c. water
1 carrot, diced
2 tbsp. minced ginger
2 tbsp. curry powder
8 scallions
1/3 c. raisins
1/3 c. tomato paste
1 14 oz. can coconut milk
2 tsp. salt
2 tbsp. earth balance or olive oil
cilantro to garnish


Rinse the split peas and lentils and bring to a boil in a soup pot with the 7 cups of water.  Once boiling add 1/2 the ginger and the diced carrot.  Let simmer covered for 30 minutes.  


Meanwhile, lightly toast the curry powder in a frying pan over low heat.  Set aside.  In another pan saute the diced scallions with the butter.  Add the rest of the ginger and raisins.  Saute for a few minutes, then add the tomato paste.  Saute an additional few minutes until well mixed together.  Remove from heat and mix in the curry powder.  Add this to the soup along with the coconut milk and simmer uncovered for 15-20 minutes.  Serve with some diced cilantro and cracked pepper.


This soup has to be one of my absolute favorite new recipes!  It has a wonderful flavor and the cilantro brings out the coconut and  the curry brilliantly!


Now, what detox dinner wouldn't be complete without a delicious beverage?  So, here we have a fun and refreshing take on water...add stuff to it!!!!  I added a few torn mint leaves and a lemon wedge with the juice.  Makes drinking much more tasty and fun than that same old plain, boring water you always drink!  Especially when you are probably going to need to take in double just to get your body to stop hating you!


Here it is folks, a dinner that will rival Mr. Daniels any day of the week! Plenty of vitamins, minerals and wonderful things to re-hydrate your dried up and neglected cells.  Good news: Doyle with live to fight another day!


Saturday, December 31, 2011

Let the Countdown Begin!!!

Seeing as the title so closely matches today's festivities (being New Year's Eve and all...) I want to make it perfectly clear that this is not a New Year's resolution!  Something that we believe whole-heartedly in for about a week and then casually forget about like an old toy.  This is 90 days of proving that what you put into your body effects what comes out of it (and I'm not just talking about poop.)  This is why I am starting it the day before!  No negative New Year's karma!


I have been probing the documentary world for some time now and was shocked at how poorly I ate.  Don't get me wrong, I've always been a big fan of produce and lots of other healthy things. Unfortunately for me, I like to eat them lying next to a big, juicy steak or drenched in cheese.  In school I don't remember really being taught about nutrition until I was in college.  I remember being in high school and thing that Cheeze-its were a health food.  


While learning about all of the things that are wrong with the food industry and agriculture I tried to figure out the right way to eat.  


My week's worth of treats form Whole Foods cost me less than $50 and will, hopefully, be much nicer to my insides!


Now that my kitchen has been transformed into a vegan hippie heaven it is time for me to get to work!  I will be checking in each week (at least once) to share recipes and any other fun, nutritious, food facts that I may find.  And, I will also let you know how it is working!  Trust me...if this stuff doesn't make me feel better I will be back to grilling steaks and eating salad...on the side!


Wish me luck!  Ready,set, go...

Wednesday, August 3, 2011

Peter Should Have Picked More Than Just Some Peppers!


Pickling began 4000 years ago using cucumbers native to India. This was used as a way to preserve food for out-of-season use and for long journeys, especially by sea. Salt pork and salt beef were common staples for sailors before the days of steam engines. Although the process was invented to preserve foods, pickles are also made and eaten because people enjoy the resulting flavors. Pickling may also improve the nutritional value of food by introducing B vitamins produced by bacteria.  Pickling has attained its popularity all over the world.  Whether a Korean feast of pickled vegetables or a way to survive a harsh western European winter pickling has been a staple to many cultures across the decades. In fact, my microbiology professor even gave us a quick sauerkraut demonstration in class in order to show how delicious healthy bacteria can taste!  Perhaps with our current generation pickling is not quite the necessity in America, but it is making quite the trendy comeback.  Even the gentleman at the hardware store that helped me find my pickling jars was saying that these babies are starting to pick up in sales.  

Now, I have made pickled daikon and carrot in the past for Vietnamese dishes, but I have never truly dove into the process of pickling (aside from one very tragic attempt at pickles that turned into a jar of cucumbers that tasted like nasty feet covered in vinegar).  All I can say from my experience was that all of these wonderfully sour treats were really fun to make! Mike and I made a day of pickling and I think that he enjoyed it as much as I did ...especially the jalapenos!


We made pickled jalapenos, zucchini chips, bean sprouts and kim chee! I am not one to blog about recipes in traditional recipe form.  That list of ingredients and all of those directions just make cooking more of a chore sometimes.  What can I say?  It just isn't my style, but, for organizational purposes I am going to do it that way for this entry.  This way you can quickly scroll through in the future to find the recipe you want instead of having to read this entire thing yet again!

Kim Chee


1 large Chinese or Napa Cabbage
1 gallon (4l) water
1/2 cup (100g) coarse salt
1 small head of garlic, peeled and finely minced
one 2-inch (6cm) piece of fresh ginger, peeled and minced
1/4 cup (60ml) fish sauce
1/3 cup (80ml) chili paste or 1/2 cup Korean chili powder (or Thai chili paste)
1 bunch green onions, cut into 1-inch (3cm) lengths (use the dark green part, too, except for the tough ends)
1 medium daikon radish, peeled and grated
1 teaspoon sugar or honey


Slice the cabbage lengthwise in half, then slice each half lengthwise into 3 sections. Cut away the tough stem chunks.  


Dissolve the salt in the water in a very large container, then submerge the cabbage under the water. Put a plate on top to make sure they stay under water, then let stand for 2 hours.  
Mix the other ingredients in a very large metal or glass bowl.  
Drain the cabbage, rinse it, and squeeze it dry.  
Here’s the scary part: mix it all up!  
Some recipes advise wearing rubber gloves since the chili paste can stain your hands, but I didn't have a problem.  
Pack the kimchi in a clean glass jar large enough to hold it all and cover it tightly. Let stand for one to two days in a cool place, around room temperature.  
Check the kimchi after 1-2 days. If it’s bubbling a bit, it’s ready and should be refrigerated. If not, let it stand another day, when it should be ready.  
Once it’s fermenting, serve or store in the refrigerator.  I have heard that you should not store kim chee for more than 3 weeks as it can become too fermented, but I must admit that I have had jars of this stuff in the fridge for months and kept on munching on it without a problem.  


Pickled Jalapenos

5 cups vinegar (white or cider)
1 cup water
4 teaspoons salt
2 teaspoons sugar
2 pounds fresh jalapeno peppers (or yellow banana peppers or pepperoncini)
(3-6 slices from a peeled carrot, optional)
(1/2 slice of onion, optional)

When making this dish the choice of vinegar is up to you.  White vinegar looks better, but I do have to say that apple cider vinegar tastes way better...at least in this recipe!

Place the vinegar, water, salt, and sugar in a medium saucepan. Bring to a boil over high heat, reduce heat to low, and stir briefly to dissolve the salt and sugar. Cover and keep hot over low heat while you prepare the jalapenos.  
Wash the jalapenos and slice 1/4-inch thick; discard the stem ends. If using the carrot and onion, place 1 or 2 pieces of each in the jar. Pack the jalapeno slices into the sterilized pint jars. 2 pounds of jalapenos should make at least 3 pints; pack the jalapenos tightly, but do not crush them.  Ladle the brine over the jalapenos.  If the liquid does not completely cove the peppers at a little water in order to do so.  Let then jar cool to room temperature and then refrigerate.  The peppers should be ready to eat in 1-2 days.


Pickled Bean Sprouts


1/2 lb. of bean sprout
1 c. water
1 c. white vinegar
1/2 c. of sugar
1/2 of a carrot (optional)
pinch of salt


I first got the idea to try this dish when Mike and I were at out favorite local Korean restaurant.  Before they serve you your entree they bring you an array of tiny dishes each filled with a different pickled item.  While El Guapo may have a plethora of pinatas I had a plethora of pickles!  One of these items being bean sprouts.  Every time I buy bean sprouts for a particular meal I always end up throwing half of the bag away.  They go bad so fast once that little plastic bag is open and I just never seem to eat them fast enough. This was the perfect fix to my bean sprout wasting problem!

Pack you canning jar with bean sprouts and your shredded carrot if you wish.  In a small sauce pan bring the sugar, water and vinegar to a simmer.  Let it simmer for 3 minutes then turn the heat off and let it cool a bit so that the liquid doesn't cook the sprouts when you pour it in the jar.  Once the liquid is cooled off a bit pour to cover the bean sprouts.  Let the jar cool to room temperature and then store in the refrigerator.  The bean sprouts are ready to eat in just a few hours.

Pickled Watermelon

2 cups apple cider vinegar
1 cup water
1/2 cup sugar or honey
1 1/2 teaspoons salt
1 teaspoon whole cloves
4 small, dried chiles
4 wide strips lemon peel
1 (1-inch) piece ginger, peeled and thinly sliced
1 1/2 pounds peeled watermelon rind, cut into (1/3-inch) chunks (about 5 cups)
8 radishes, cut into small wedges

This is a recipe that I stole from Whole Foods' website.  Though I have heard mixed reviews about it I have to say that it is the best sounding one that I could find.  Pickled watermelon is something that I think is not necessarily a crowd pleaser in general...maybe it is an acquired taste.  Who knows?  They are something that I think everyone should try at least once just to get in touch with any southern roots that may exist in blood line!


Put the vinegar, water, sugar or honey (I used sugar), salt, cloves, chiles, lemon peel and ginger into a medium pot and bring to a boil over medium high heat. Add rind, reduce heat to medium low, cover and simmer until rind is tender and translucent, 8 to 10 minutes. Uncover pot and stir in radishes.  Spoon contents of pot (with pickling liquid) into glass jars, seal tightly and chill overnight. Serve right away or store in the refrigerator for up to 2 weeks.

And...last, but definitely not least...

Pickled Zucchini Chips

3 medium zucchini (1 pound / 16 oz / 450 g), thinly sliced

1 medium white onion, thinly sliced

3 shallots, thinly sliced
1 1/2 tablespoons fine grain sea salt
1/4 cup (small handful) fresh dill sprigs
1 small fresh red chile pepper, very thinly sliced
1/2 tablespoon yellow mustard seeds
3/4 cup / 180 ml cider vinegar

3/4 cup / 180 ml white wine vinegar

1/3 cup / 1.75 oz / 50g natural cane sugar


Toss the zucchini, onion, shallots, and salt together in a colander and place over a bowl to catch the liquids. Cover the bowl and refrigerate for at least a couple hours. Toss once or twice along the way. You're aiming to get as much liquid out of the zucchini as possible.

When you're finished draining the zucchini, shake off any water. At this point you want the zucchini as dry as possible. Place in a jar along with the dill, chile pepper, and mustard seeds. 

Combine the ciders and sugar in a small saucepan over medium heat. Bring to a simmer, stirring until the sugar dissolves, and continue to boil for a few minutes. Pour the liquid over the zucchini and seal the jar. Let cool, then refrigerate. The pickles are good for a week or so.


There you have it!  A solid days worth of pickling.  Have at it my savory and sour flavored lovers and if anyone comes across more pickling goodness that I have missed please share!


Wednesday, July 27, 2011

All You Need Is Love...And a Little Pesto Pasta Salad.

Now that the weather is FINALLY cooperating with the summer months it is the perfect time for some summer love in the sun.  Picnics, barbecues and beers on the roof...ah, the wonderful feeling of friends and food in the beautiful sunshine!  Can anything beat that?  I don't think so!  Next time you are in need of a deliciously refreshing side dish to contribute look no further.  My pesto pasta salad is just the right companion for some barbecued chicken and margaritas.


When I make this salad I never measure the ingredients.  I just toss everything in so that it makes a colorful palette of purple, blue, green and white in the bowl and then dress it just enough to get all of the ingredients wet.  I start with two packages of Trader Joe's fresh pesto tortellini.  Boil the tortellini according to the directions on the package (about 5-8 minutes).  The pasta is done once it has expanded and they are all floating atop of the boiling water.  Drain and rinse with cold water to cool the pasta and stop the cooking process.  In a large bowl combine the pasta with crumbled feta, very finely diced red onion. chopped tomato and chopped arugula.  For the dressing combine 1 part olive oil, 1 part red wine vinegar, the juice of 1 lemon, salt and pepper.  Mix all ingredients and make sure that all of the salad is moistened by the dressing.  I also add some fresh oregano (you can also use dried, but put in a bit more than you would if using fresh as the taste is less potent) and some zest of the lemon used for the dressing.  If there are leftovers it keeps well in the fridge for about 3-4 days.

This salad would also be great with kalmata olives and cucumber...depending on how sassy you are feeling that day feel free to play with the ingredients.  It always seems to turn out tasting amazing no matter what!